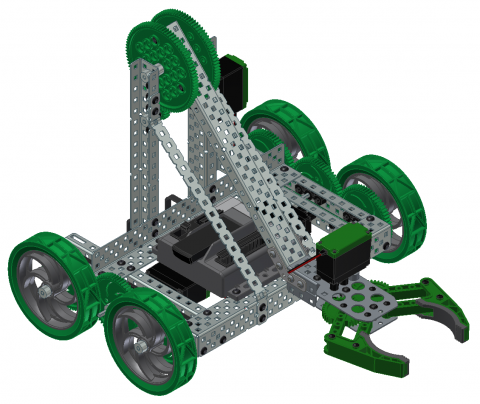
Below are files for the Autodesk VEX Robotics Kit of Parts. Download and unzip these files and save them in a new project folder called ‘VEX_KOP.’ Files are available in Imperial and Metric units, and will work for Inventor version 2013 onward.
Inventor_2013_VEX_KOP_-_Imperial.zip
Inventor_2013_VEX_ KOP_-_Metric.zip
Basic Inventor Commands Overview
Below are a few basic commands that need to be reviewed to enable you to complete some of the design tasks in the Units. Select each of the following videos for a quick overview of the commands used in Autodesk Inventor. If you are already comfortable with navigating the Inventor interface, skip directly to the videos you need to review.
Primary Environment
In this video, students will learn the four different file types in Autodesk Inventor and how they are used. The drawing file types are applicable for all recent versions of Inventor.
UI Navigation 1
In this video, students will learn about the Ribbon, Tabs, Panels and Extended Panels. They will also learn how to change the appearance of the Ribbon.
Note: There may be some variation in location and availability of tools in the panel menus in recent versions of Autodesk Inventor.
UI Navigation 2
In this video, students will learn about the Browser menu, Application menu, and Quick Access Toolbar.
Graphics Window Display
In this video, students will learn how to change application options, display colors, and icon styles.
Note: There may be some variation in location and extra options available in the applications menu in recent versions of Autodesk Inventor.
Navigation Controls
In this video, students will learn about the View Cube, Function Keys and the Navigation Bar.
Project Files
In this video, students will learn how to create a project file and manage a project.
Creating Assemblies 1
In this video, students will learn how to create assemblies and apply constraints. Degree of Freedom for a particular part will be reviewed as well as grounding parts.
Note: In later versions of Autodesk Inventor, the first component inserted is not automatically grounded unless you insert by positioning with the Right mouse button and selecting the 'PlaceGrounded at origin' option.
Creating Assemblies 2
In this video, students will learn how to insert parts from the Content Center. They will also be shown the difference between Bottom Up Modeling and Top Down Modeling using adaptive parts.
Viewing Assemblies
In this video, students will learn about the three different view representations of an assembly: Position, View and Level of Detail.
Visualization
In this video, students will learn how to render images and animations of 3D models.
2D Sketches
In this video, students will learn about template, IPT part files, coordinate systems and creating 2D sketches.
Note: The file type shown in the video is for an Imperial part drawing (in).ipt. A metric equivalent can be found in the metric template folder (mm).ipt.
Part Browser
In this video, students will learn about the Brower and sharing sketches.
Line and Fillet Tool
In this video, students will learn about the line and fillet sketching tools.
Geometric Constraints
In this video, students will learn how to add and remove geometric constraints as well as show specific constraints on a model.
Dimensional Constraints
In this video, students will learn about how to dimension a sketch, degrees of freedom, and how to tell if a part is fully constrained.
Part Basics
In this video, students will learn about basic features and creating sketches for features like Extrude and Revolve.
Creating Parts 1
In this video, students will learn a variety of ways to extrude features on a part.
Creating Parts 2
In this video, students will learn how to create fillets, chamfers and threads.
Creating Parts 3
In this video, students will learn how to create a variety of different style holes in a part.
Work Features
In this video, students will learn about work points, axes and planes.
Pattern Features
In this video, students will learn how to mirror features and create rectangular and circular patterns.
Part Properties
In this video, students will learn about iProperties and how to modify the physical properties of a part.
Creating Drawings
In this video, students will learn how to create new IDW drawings, change sheet sizes and title blocks, as well as add several views of the part to the drawing.
Note: Metric template .idw and metric size layouts and borders are also able to be selected using this method.
Basic Fusion Commands Overview
Below are a few basic commands that need to be reviewed to enable you to complete some of the design tasks in the Units. Select each of the following videos for a quick overview of the commands used in Autodesk Fusion. If you are already comfortable with navigating the Fusion interface, skip directly to the videos you need to review.
User Interface
In this video, students will learn about the basic user interface in Autodesk Fusion.
Dashboard
In this video, students will learn about the Dashboard User Interface.
Data Panel
In this video, students will learn about the Fusion Data Panel.
Start an Empty Design
In this video, students will learn how to start a new Fusion design and start creating some Geometry. Starting in the Model workspace the students will create a simple shape using the Box and Cylinder commands. They will then look at creating more complicated shapes using the Sketches and Dimensions Commands to create a 2D shape, using the Create commands to produce a 3D shape. Finally they will create a more organic curved profile using the Sculpt and Form Commands.
Create and Edit Sketches
In this video, students will learn how to create and Edit sketches in Autodesk Fusion.
Use Sketch Entities
In this video, students will learn how to use sketch entities in Autodesk Fusion.
Use Mirror Symmetry
In this video, students will learn how to use the Mirror Symmetry Command.
Use Radial Symmetry
In this video, students will learn how to use the Radial Symmetry Command.
Use the Combine Command
In this video, students will learn how to use the Combine Command.
Draft Command
In this video, students will learn about the Draft Command.
Fillet and Chamfer
In this video, students will learn how to use the Fillet and Chamfer commands.
Insert Edge
In this video, students will learn how to use the Insert Edge Command.
Insert Point
In this video, students will learn how to use the Insert Point Command.
Subdivide
In this video, students will learn about the Subdivide Command
Press Pull
In this video, students will learn how to use the Press Pull Command.